Don't Let Your Softener Valve Get You Steamed
- Allstar Plumbing Heating & AC

- Jun 12
- 8 min read
When Your Water Softener Valve Fails, Here's What to Do

If you need to repair a water softener valve, here's a quick summary of the most common fixes:
Problem | Likely Cause | Quick Fix |
Hard water returning | Failed motor or rotor | Replace motor or rotor/seal kit |
Salt not going down | Clogged venturi or bad rotor | Clean venturi, rebuild seal kit |
Valve stuck in one cycle | Motor failure | Replace valve motor |
Leaking around valve head | Worn O-rings or cracked body | Replace O-rings or full valve head |
No water during regeneration | Solenoid or valve position issue | Check bypass, inspect solenoids |
Most valve repairs take 30 minutes or less and only require a Phillips screwdriver and basic replacement parts.
Your water softener works hard every day — quietly removing the calcium and magnesium minerals that make Utah's water so tough on pipes, skin, and appliances. But when the control valve starts to fail, you notice fast. Soap stops lathering. Skin feels itchy and dry. Scale builds up on faucets and showerheads.
The good news? A failed valve doesn't mean you need a whole new system. In many cases, repairing the water softener valve restores full function — and can add another 10 to 20 years to your softener's life.
This guide walks you through everything: diagnosing the problem, safely shutting the system down, replacing key components, and testing the repair.
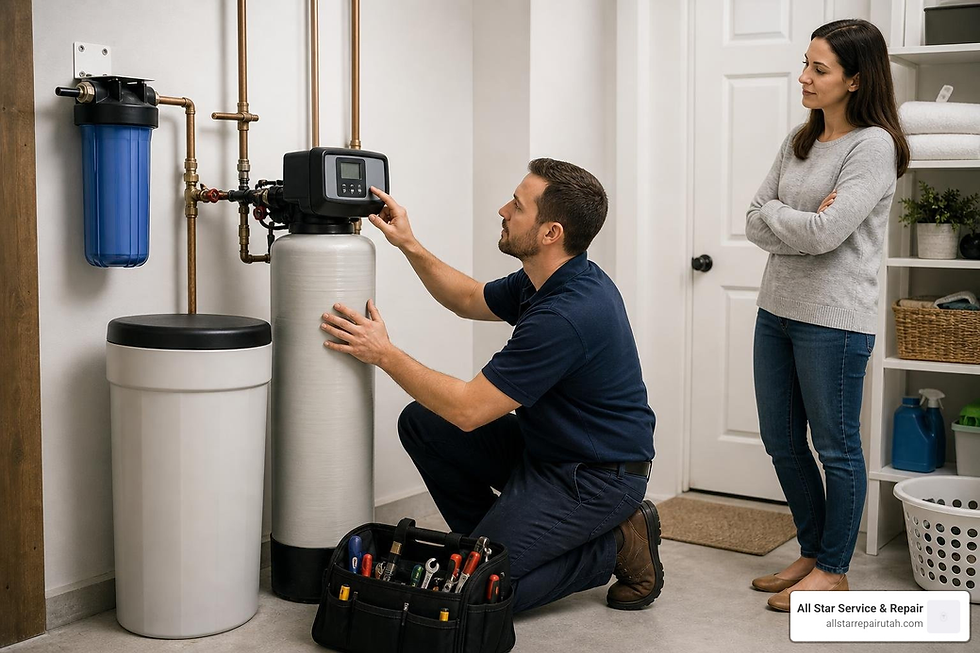
I'm Adam Wettach, owner of All Star Service & Repair, and I've spent years helping Utah homeowners troubleshoot and repair water softener valves across a wide range of brands and systems. Whether you're tackling this yourself or want to know what a technician should be doing, this guide has you covered.

Troubleshooting and How to Repair Water Softener Valve Issues
When your water starts feeling "crispy" again, the control valve is usually the prime suspect. The valve is the "brain" of your system; it tells the water when to flow through the resin and when it’s time to clean that resin with brine. If the brain isn't working, the whole body shuts down.
Common symptoms that you need to repair a water softener valve include:
Hard Water Symptoms: If you see white spotting on your glassware or feel a film on your skin after showering, your valve might not be initiating the regeneration cycle. You can learn more about The Effects of Hard Water on Your Utah Plumbing to see why this is a priority.
Salt Level Stagnation: If the salt in your brine tank hasn't moved in a month, the valve isn't drawing brine. This often points to a clogged venturi or a failed rotor seal.
Motor Failure: Most modern valves use a small electric motor to turn the internal cam. If you hear a clicking sound or no sound at all during a manual recharge, the motor has likely given up the ghost.
Constant Draining: If you hear water running into your floor drain 24/7, the valve is stuck in a cycle, usually because of a broken internal seal or a faulty switch.
At All Star Service & Repair, we often find that a simple Water Softener Tune-up can catch these issues before they lead to a total breakdown. However, if you're already past that point, specialized Water Softener Repair and Replacement services are the next step to getting your water back to its silky-smooth state.
Preparation: Safety, Bypassing, and Depressurization
Before you grab your screwdriver to repair a water softener valve, you have to make sure you won't turn your basement into a swimming pool. Working on a pressurized valve is a recipe for a mess.
Step 1: Engage the Bypass
Locate the bypass valve on the back of your unit. Most systems use a push-pull handle or two turn-knobs. Pushing the handle "IN" typically diverts water away from the softener and directly into your home. This allows you to keep the water on in your house while the softener is "off-grid." For a deeper dive on how these work, check our guide on the Bypass Valve Water Softener.

Step 2: Depressurize the System
Even with the water bypassed, there is still pressurized water trapped inside the valve and tank.
Manual Regeneration: Press and hold the "Recharge" or "Regenerate" button until the motor starts moving.
Advance the Cycle: Once the motor stops at the first stage (usually "Backwash"), you'll hear a hiss of air or water. This releases the internal pressure.
Unplug the Unit: Now that the pressure is gone, safely disconnect the electrical power cord from the wall outlet.
Step 3: Clear the Area
Have a bucket and a few old towels ready. Even a depressurized valve will have some residual water in the lines. If you're unsure about the state of your system, a professional Water Softener Inspection can ensure everything is safe before disassembly.
Step-by-Step Guide to Repair Water Softener Valve Components
Now that the system is safe, we can get into the nitty-gritty of the repair. Most DIY repairs focus on two main areas: the motor and the internal rotor/seal kit.
How to Repair Water Softener Valve Motors and Rotors
The motor is the muscle that moves the internal parts through the different cycles. If the motor fails, the system stays stuck.
Remove the Cover: Most covers are held on by plastic clips at the back or front. Pop these off to reveal the valve head.
Disconnect the Motor: You’ll see a small motor (usually silver or black) held in by two Phillips screws. Unplug the wire harness from the control board.
Swap the Motor: Remove the screws, pull the old motor out, and slide the new one in. Ensure the gear on the motor aligns with the large cam gear.
Reference Guide: For specific brand-name instructions, you can follow this How to replace a water softener valve motor | Repair guide.

Rebuilding the Internal Seal Kit to Repair Water Softener Valve Leaks
If your valve is leaking internally or not drawing brine, the rotor and seals are likely worn out. This is a very common repair water softener valve task for brands like Kenmore and Whirlpool.
Access the Rotor: After removing the motor and the top plate of the valve (usually held by 5–6 screws), you will see the rotor disc and a series of rubber seals.
Clean and Lubricate: Remove the old seals and the rotor. Clean the valve body thoroughly. Use high-quality silicone grease (never petroleum jelly!) to lubricate the new O-rings and seals. This prevents them from drying out or cracking.
Orientation Matters: Pay close attention to the "notches" on the seals. On many units, the venturi seal must be seated in a specific direction to allow brine flow.
Brand Specifics:
For Whirlpool owners, see the Rotor/Seal Kit Replacement – Whirlpool guide.
For Kenmore owners, follow the Rotor/Seal Kit Replacement – Kenmore steps.
Reassembly and System Synchronization
Once the new parts are in, you can't just plug it in and walk away. The valve needs to be "synced" so the computer knows where the gears are positioned.
Cam Positioning: When reassembling the cam and gear, look for the "Service" mark (often indicated by an 'S'). On many models, this mark should be visible through a small peep hole in the housing.
Reconnect Lines: Reattach the brine line and drain hose. Ensure the brine hose is pushed firmly into the collet (usually about 5/8 of an inch) until you feel resistance.
Dry Recharge: Plug the unit back in. The motor will likely whir for a moment as it finds its "home" position. It is often recommended to perform a "dry recharge" — advancing the valve through its cycles manually while the water is still in bypass — to ensure the mechanical parts move freely.
Check for Leaks: Slowly open the bypass valve to let water back into the unit. Check for leaks around the valve head and hose connections. Ongoing Water Softener Maintenance involves checking these seals periodically.
Valve Body Notes: If the actual plastic housing is cracked, you may need to follow the steps for Replacing the Valve Body – Rheem to swap the entire internal assembly into a new shell.
When to Replace the Entire Valve Head vs. Resin Media
Sometimes, a simple repair isn't enough. If the valve body is cracked or the electronics are fried, a full valve head replacement is often more cost-effective than buying individual parts.
Feature | Valve Repair | Resin Replacement | Full System Replacement |
Typical Cost | $50 - $150 | $150 - $300 | $1,000+ |
Life Extension | 5 - 10 years | 10 - 15 years | 15 - 25 years |
Difficulty | Easy (30 mins) | Moderate (2 hours) | Professional |
Best For | Motor/Seal failure | Old/Mushy resin | Cracked tanks/Ancient tech |
The Resin Factor
While you are working to repair a water softener valve, take a moment to consider your resin.
Well Water: Resin can last 30 to 40 years because there is no chlorine to break it down.
City Water: Chlorinated water (common in Provo and Northern Utah) acts like an acid on resin beads. We recommend replacing resin every 10 years on city water.
If your valve is moving correctly but the water stays hard, your resin might be "mushy." You can test this by taking a small sample of resin and squeezing a bead between your fingers. If it crushes easily like a piece of cooked rice, it's time for a Water Softener Replacement or at least a resin swap. For those replacing the entire top unit, see the Valve Head Replacement - Water Softener guide.
Frequently Asked Questions about Valve Repairs
How do I identify my specific valve brand and model?
To get the right parts, you need the "pedigree" of your machine.
Serial Number: Look on the inside rim of the salt tank, usually under the lid hinges.
Model Number: Usually, the first seven digits of the serial number represent your model.
Brand Differences: Some brands, like Autotrol, have the water inlet on the left, while Fleck and Kenmore usually have the inlet on the right. Knowing this prevents you from buying a Replacement of Control Valve on Water Softener Tank that won't line up with your plumbing.
How long does it take to repair a water softener valve?
For most Utah homeowners, a standard repair water softener valve project takes 30 minutes or less. It’s a "Saturday morning" project. You’ll mostly need a Phillips screwdriver, a pair of pliers, and some silicone lubricant. It is considered a low-to-medium difficulty DIY task.
Why is my salt level not dropping despite the valve moving?
This is a classic "ghost" problem. The valve looks like it's working, but the water isn't getting soft.
Salt Bridge: A hard crust of salt has formed, leaving a hollow space underneath. Break it up with a broom handle.
Clogged Venturi: The venturi creates the suction to pull brine. If a tiny piece of sediment gets in there, no brine is drawn.
Rotor Failure: If the internal rotor disc is scratched, water might bypass the brine cycle entirely. Check out the How do I troubleshoot softener valve? - DoItYourself.com forum for more community-sourced troubleshooting tips.
Conclusion
Repairing your water softener valve is one of the most rewarding DIY plumbing tasks you can take on. By spending a little time and a few dollars on a seal kit or a motor, you can save thousands on a full system replacement and protect your home from the ravages of hard water.
However, we know that not everyone wants to spend their weekend elbow-deep in a brine tank. If you’re in Provo or anywhere in Northern Utah and your softener is giving you grief, All Star Service & Repair is here to help. We pride ourselves on integrity, transparency, and straightforward pricing. Whether you need a quick part replacement or a brand-new Water Softener installation, our team is ready to provide superior service that keeps your water soft and your pipes happy.
Don't let a faulty valve get you steamed — give us a call today, and let's get that water back to its best!


Comments